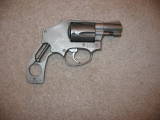
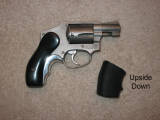
One of the overlooked elements of the snub carried in an ankle holster is where do you put the gun after the draw stroke. Returning the snub to the ankle holster is a more time- and attention consuming affair than the relatively simple practice of drawing of the gun. Trying to return the snub to the holster following an actual confrontation may be dangerously distracting, impractical or both. Slipping the gun into a pocket may be convenient, but if the situation suddenly flares up again, a fast follow-up draw may be problematic. Keeping the gun in the hand might be disconcerting to area witnesses and certainly so to responding public safety professionals. Fortunately there are a few possible solutions.
BARAMI HIP-GRIP
Officer Bob Schwartz of the Grantham, NH police department was the first to point out the advantages offered by attaching the Barami Hip-Grip to the ankle holstered snub.
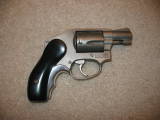
The Barami Hip-Grip is a hard plastic set of replacement revolver stocks. The right grip panel has an “extension” or flared flange that protrudes away from the traditional contours of the right side stock. Once attached to the revolver, the flange sits up and over the top of the beltline and prevents the revolver from slipping down behind the shooter’s pants. The Hip-Grip is available for a wide variety of revolvers including both square and round butt J- and K-frame S&W’s, some D-frame Colts, and a few models of the Taurus, Charter Arms and Rossi revolvers. In additional to basic black, there are a select few models available in off-white, tan, brown, and in the case of the round butt J-frame, pink.
A Barami Hip-Grip on the ankle gun addresses several topics. First, it supplies a solution to the where-to-put-the-snub after an actual drawing for self-defense incident. Second, whenever an ankle holster is impractical, the Hip-Grip offers several immediate, alternative carry options. Third, a Hip-Grip equipped snub passed to a “trusted other,” supplies its own integrated holster solution.
The smooth surface of the Barami Hip-Grip is often counted as a flaw, but I believe it only enhances concealment by not printing or sticking to a portion of the cover garment. The Barami Hip-Grip does display the same limitations as original or classic stocks from S&W. Designed to maximize concealment; classic J-frame stocks follow the profile of the frame’s back strap, butt and front strap. Optimal for maximizing concealment and reducing printing, they are dreadful for control recoil, notably in rapid fire. A traditional solution that both remains available and nicely enhances the Barami Hip grip is the Tyler T-Grip Adapter.
TYLER T-GRIP ADAPTOR
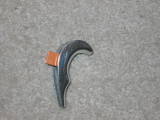
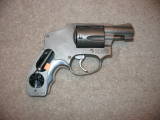
Invented by Melvin Tyler decades ago, the Tyler T-Grip adapter is a crescent shaped wedge of cast metal with a U-shaped strip of copper riveted to the inside of the convex portion. The T-Grip is designed to fill in the hollowed area between the revolver’s trigger guard and the front strap, and is held in place by friction. The stocks of the revolver are loosened but not removed. The two parallel flanges of the copper clip are slid between the stocks and the revolver’s frame. Once the stocks are retightened, the T-Grip is secured. The T-Grip now replicates the grip filling proportions found on contemporary stocks, and substantially improves recoil control.
There are T-Grip adapters to fit a variety of revolvers including round and square butt J- and K-frame S&W’s as well as several models of Taurus, Rossi, Charter Arms, Colt and Ruger. The T-Grip is produced in a variety of finishes including manganese bronze, polished aluminum, brushed aluminum, flat black and shiny black power coat. Any snub revolver with a set of Barami Hip grips and a Tyler T-Grip adapter is a first rate self-defense combination.
Whether you don’t ever expect to take the snub out of the house or the office or if you carry it in either an ankle or a pocket holster some form of post-encounter weapon securing method is still important. Now there are several very popular methods for securing a snub on your person. Two of the best for those snubs than don’t have a dedicated holster or for those owners who might find returning their snub in their deep concealment carry location awkward include Skyline Technology’s Clipdraw from John Rugh and the Barami Hip-Grip available through Barami Hip-Grip


 Posted by snubtraining